
How to Use Vacuum Storage Bags Like a Pro: Step-by-Step Guide
Master the Bag, Maximize the Space
Vacuum storage bags are simple to use — but there’s a difference between using them and using them like a pro. Whether you’re decluttering your closet, prepping for a move, or packing for a trip, these bags can make your life easier — but only if you know how to use them properly.
In this guide, we’ll show you exactly how to use vacuum storage bags step by step, including common mistakes to avoid and pro tips for long-term storage.
✅ What Are Vacuum Storage Bags? (Quick Recap)
They are specially designed plastic bags with a seal and an air valve. When you place soft items (like clothes or bedding) inside, you can use a vacuum cleaner to suck out the air, compressing the items and saving a ton of space.
🛠️ How to Use Vacuum Storage Bags — Step-by-Step
Step 1: Choose the Right Size Bag
Vacuum bags come in multiple sizes — small, medium, large, and jumbo. Choose a size based on the items you’re storing.
Tips:
-
Small bags: Great for travel or sweaters.
-
Medium/Large: Ideal for blankets, jackets, towels.
-
Jumbo: For duvets, pillows, and bulk storage.
⚠️ Avoid overfilling — it can cause leaks or poor compression.
Step 2: Fold Items Neatly (Don’t Cram)
Neatly fold or roll your items. This:
- Prevents creases and wrinkles
- Ensures even air distribution
- Maximizes space usage
Throwing items in randomly might lead to poor compression or damage to zippers.
Step 3: Pack the Bag (But Don’t Cross the Fill Line)
Most vacuum bags have a “fill line” marked near the zip seal. Keep your contents below this line to allow space for sealing.
What you can store:
- Clothes
- Bedding
- Soft toys
- Towels
- Curtains
Avoid:
- Sharp objects (can puncture the plastic)
- Food or perishables
- Leather (can crack over time)
Step 4: Seal the Zip Lock Properly
This is where many people go wrong.
- Slide the included zipper clip across the seal twice
- Press down along the seal with your fingers for extra security
- Ensure the zip is completely closed end-to-end
❗ If air leaks back in after compression, 90% of the time it’s due to a poor seal.
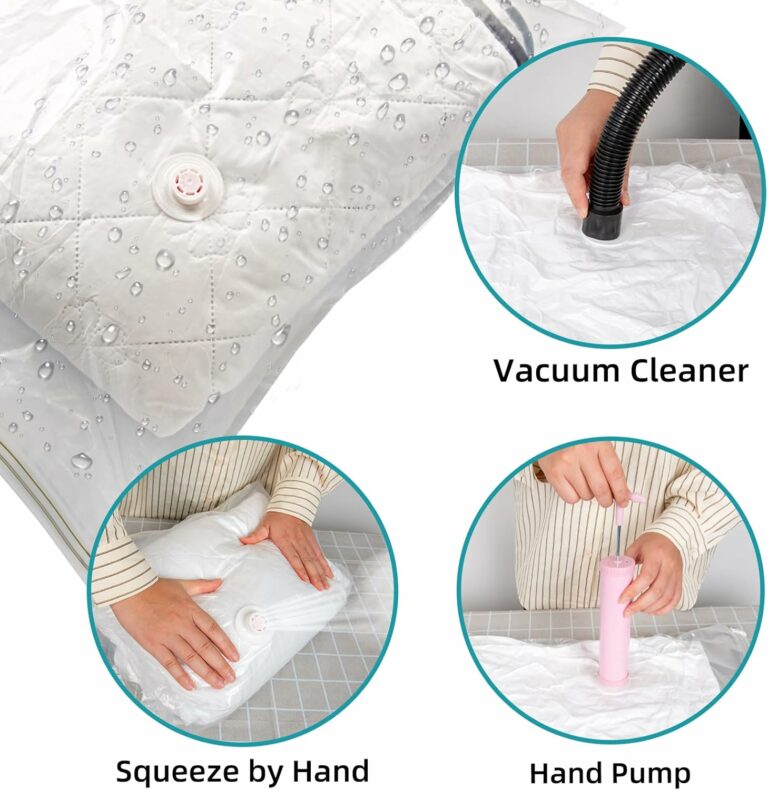
Step 5: Use a Vacuum or Hand Pump
Attach your vacuum hose to the air valve on the bag.
- Turn the vacuum on and watch the bag compress
- Once all air is out, close the valve quickly
- For travel bags: use a hand pump or roll the air out manually
Pro Tip:
Don’t over-compress — for long-term storage, leave a bit of cushioning to protect fabrics.
🧼 Bonus: How to Store Vacuum Bags After Packing
After sealing, store them in:
- Under-bed drawers
- Closets or wardrobes
- Suitcases (for travel)
- Stackable bins (for garage or basement)
Avoid direct sunlight or damp areas to prolong the bag’s life.
❌ Common Mistakes to Avoid
| Mistake | Why It’s a Problem |
|---|---|
| Overfilling the bag | May break the seal or cause leaks |
| Not sealing properly | Air leaks in, bag inflates again |
| Using with leather or down | May damage sensitive materials |
| Storing in hot areas | Can degrade plastic faster |
💡 Pro Tips for Best Results
-
Label bags (e.g., “Winter Jackets,” “Guest Bedding”)
-
Store heavier bags flat to avoid putting pressure on the seal
-
Don’t vacuum every week — repeated compression can wear items down
-
Clean and air out stored items every 6 months if kept long-term
✅ Conclusion: Become a Vacuum Bag Expert
Used properly, vacuum storage bags can make your home more organized, your travel lighter, and your storage way more efficient.
Take a few extra seconds to follow the correct steps — and your clothes, bedding, and storage space will thank you.
Leave a comment